The Ultimate Guide to Upcycling and Flipping Thrifted Furniture
Alright, let’s cut the fluff. You’ve seen those insane before-and-afters online, right? That tired, dusty dresser suddenly looking like a Pinterest dream. You’re thinking, “I could do that.” And you absolutely can. This isn’t about fancy degrees or million-dollar workshops. It’s about seeing potential where others see junk. It’s about giving old pieces a new life and, yeah, making some serious cash on the side. Or, if you’re lucky, turning it into a full-time gig. We’re diving deep into the wild, wonderful world of flipping thrifted furniture.

Source : youtube.com
Why Bother With Old Furniture?
Let’s be real. Buying new furniture can be a total rip-off. Particle board that falls apart after a year? A king’s ransom for something that screams “mass-produced”? Nah. Thrifted furniture, on the other hand, often has solid wood construction, unique details, and a history. It’s got character. Plus, it’s way better for the planet. Think about it: instead of adding to landfill, you’re giving something a second act. It’s the ultimate win-win.
And the money? Oh, the money. I’ve seen people turn a $20 garage sale find into a $200+ sale. It’s not magic; it’s elbow grease and a bit of vision. You learn to spot the diamonds in the rough. That wobbly chair? Might just need a new joint and a fresh coat of paint. That scratched-up table? Sand it down, stain it, bam! Instant beauty.
Where Do You Find These Treasures?
This is where the hunt begins. Forget the sterile showrooms. We’re talking about the dusty corners, the forgotten attics, the digital marketplaces. Your local thrift stores, charity shops, and antique malls are goldmines. But don’t stop there. Garage sales, estate sales, even Facebook Marketplace and Craigslist are loaded with potential. Sometimes, people give away furniture for FREE just to get rid of it. Seriously. Keep your eyes peeled. You never know when you’ll stumble upon your next big score. I once found a solid oak vanity for fifty bucks because the seller just wanted it gone before their moving day.
The key is to be persistent and know what you’re looking for. Do a quick search for popular furniture styles to get a feel for what sells. Mid-century modern, farmhouse, industrial – these are always in demand. But don’t be afraid to go against the grain. Sometimes a truly unique piece, even if it’s not trendy, can fetch a good price if you market it right.
Okay, I Found Something. Now What? The Upcycling Tutorial Deep Dive
Source : businessinsider.com
This is the fun part. The transformation. It’s not just about slapping on some paint. It’s about breathing new life into an old piece. Here’s a breakdown of how to approach your first few projects. We’ll start simple and build up.
The Absolute Basics: Cleaning and Prep
You wouldn’t paint a dirty wall, right? Same applies here. First things first: clean it. Get rid of all the grime, dust, and cobwebs. A good scrub with warm, soapy water usually does the trick. For tougher stuff, a diluted TSP (trisodium phosphate) cleaner can work wonders, but wear gloves and ventilate the area. Always check the existing finish, too. Is it paint? Varnish? Lacquer? Knowing this helps you choose the right products for the next steps.
Prep is crucial. This is where most people cut corners, and it’s why their paint job looks like garbage. If there’s old, chipping paint, you gotta sand it down. Even if the finish looks okay, a light scuff-sanding with medium-grit sandpaper (around 120-150 grit) gives your new paint something to grip onto. This is non-negotiable for a smooth, lasting finish. Fill any holes or gouges with wood filler. Let it dry completely, then sand it smooth. Think of this stage as laying the foundation for a skyscraper. You wouldn’t skip that, would you?
Painting Like a Pro (Even If You’re Not)
Alright, the fun part: color! For begiers, chalk paint or latex paint are your best friends. They require minimal prep (just that light scuff-sanding) and dry relatively quickly. Spray paint is also an option for smaller pieces or details, but it can be tricky to get an even coat. Always use a good quality brush or roller.
My go-to for most projects is a good quality latex enamel. It’s durable and comes in a million colors. For that modern matte finish popular with furniture flippers, chalk paint or a mineral paint is the way to go. Apply thin coats. Seriously, thin is in. Trying to slather on one thick coat never ends well. You’ll get drips, uneven coverage, and a job that looks rushed. Let each coat dry completely before applying the next. Patience, grasshopper!
Don’t forget primer! Especially if you’re going from a dark color to a light one, or if the piece has a weird stain that might bleed through. A good primer seals everything and ensures your topcoat looks its best. Two thin coats of primer are better than one thick, gloppy one.
Beyond Paint: Staining, Sealing, and Hardware
Sometimes, paint isn’t the answer. Maybe the wood grain is gorgeous and just needs a refresh. In that case, sanding it all the way down to the bare wood and applying a new stain can be stuing. Gel stains are awesome because they go on easily and give rich color without soaking into the wood too much. Experiment with different wood tones – walnut, oak, even a dark espresso can completely change the vibe of a piece.
Once you’ve painted or stained, you NEED to seal it. This protects your hard work from scratches, spills, and general wear and tear. For painted pieces, a clear topcoat like polycrylic (water-based, so it won’t yellow like polyurethane) or a wax finish works well. For stained pieces, a polyurethane or a varnish is usually best. Apply at least two coats. And don’t skip the sanding between coats – a super-fine grit (like 220) will make it feel silky smooth.
And the hardware! Don’t underestimate the power of new knobs or pulls. Swapping out old, dated hardware for something fresh and modern can completely update a piece. Think brushed brass, matte black, or even some cool ceramic pulls. It’s like the jewelry for your furniture.
Specific Upcycling Tutorial Ideas to Get You Started
Let’s get hands-on. Here are a few ideas to kickstart your furniture flipping journey:

Source : youtube.com
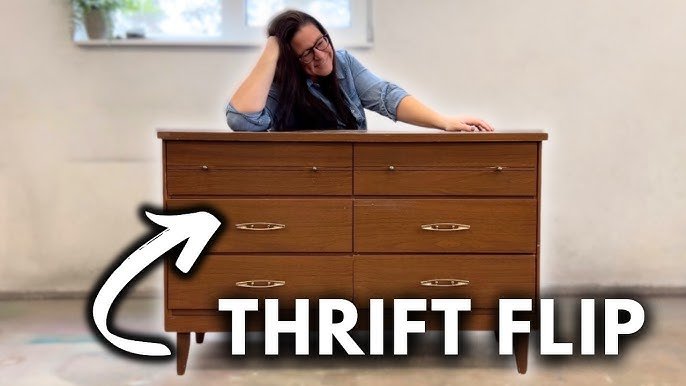
The Humble Dresser Makeover
Dressers are furniture flipping staples. Why? Because they’re functional and usually built like tanks. Find an old, solid wood dresser – the kind with dovetail drawers. Sand it down. Fill any dings. Prime it. Then, paint it a bold color like emerald green or navy blue. Swap the old knobs for sleek, modern ones. Boom. Instant statement piece. You could also go for a two-tone look – paint the body one color and stain the drawers a contrasting wood tone. That always looks super high-end.
Side Table Transformations
Small tables are great for begiers. Coffee tables, end tables, nightstands – they’re usually easier to handle and require less material. An old, scratched coffee table? Sand it down, apply a beautiful dark walnut stain, and seal it with a matte polycrylic. Or, paint a little nightstand a bright, cheerful yellow and add some fun, quirky hardware. These are perfect for those DIY furniture projects that give you a quick win.
Chair Re-Vamps
Dining chairs, accent chairs… they can be tricky but SO rewarding. If the frame is solid, you might just need to reupholster the seat. Pick a fun, durable fabric. Or, if the wood is beat up, sand it, stain it a dark color, and if the upholstery is beyond saving, replace it. A new fabric seat on an old wooden chair? Chef’s kiss.
Credenza & Buffet Chic
These larger pieces can be real showstoppers. If you find a mid-century credenza with great lines? Don’t paint it! Just clean it, maybe lightly sand and re-oil the wood to bring out its natural beauty. Update the hardware. It’ll sell like hotcakes. Or, take a plain, boxy buffet and give it a modern facelift with a sophisticated grey paint, some geometric stencils on the doors, and elegant new pulls.
Bookshelf Beautification
Basic bookshelves can become so much more. Paint the exterior a neutral color, but then go wild inside! Line the back with fun wallpaper, a bold paint color, or even some decorative tile. Add some nice trim. Suddenly, it’s not just storage; it’s a piece of art. These upcycling tutorials really show off your creativity.
Tips for Selling Your Masterpieces
So, you’ve put in the work, and your piece looks amazing. Now, how do you turn that into cash? Photography is KING. Natural light is your best friend. Take photos from multiple angles, including close-ups of details and any imperfections (be honest!). Stage the piece in a nice setting – don’t just plonk it in front of a cluttered garage door. Make it look aspirational.
Write a killer description. Highlight the updates you made. Mention the type of paint or finish used (e.g., “Professionally refinished with durable chalk paint and sealed with wax”). Use keywords like “vintage,” “mid-century,” “farmhouse,” “boho,” etc., depending on the style. Be honest about the condition but focus on the positive transformation. Mentioning the original state briefly can highlight your skills.
Where to sell? Facebook Marketplace and Craigslist are great for local sales. You’ll get a lot of tire-kickers, but also genuine buyers. For higher-end pieces, consider Etsy or even local consignment shops. Setting the right price is key. Research similar pieces that have actually sold (not just what people are asking for). Factor in your costs (materials, your time!) and price competitively but fairly. Don’t be afraid to negotiate a little, but know your bottom line.

Source : upcyclemystuff.com
Remember, selling furniture online is a numbers game. You’ll get lowball offers. You’ll have people ask if it’s still available five times and then ghost you. Stay positive, be professional, and keep listing. Your next sale is just around the corner.
Common Pitfalls and How to Avoid Them
Even the pros mess up. Here are some common mistakes to watch out for:
- Rushing the Prep: Seriously, don’t skip sanding or cleaning. It’s the difference between a pro job and a hot mess.
- Bad Paint Job: Streaky, drippy paint is a dead giveaway it wasn’t done carefully. Thin coats, people!
- Wrong Finish: Using a paint not meant for furniture, or not sealing it properly, means it won’t last.
- Ignoring Hardware: Old, tarnished hardware can totally ruin a beautiful finish. Always upgrade.
- Poor Photography: Blurry, dark photos will kill your sale before it even starts.
- Unrealistic Pricing: Price too high, and it’ll just sit there. Too low, and you’re leaving money on the table.
Learning from these mistakes is part of the process. Each piece you flip teaches you something new. Don’t get discouraged if your first few attempts aren’t perfect. Keep practicing, keep learning, and keep creating.
The Bigger Picture: Sustainability and Creativity
Beyond the cash, there’s something deeply satisfying about upcycling furniture. You’re participating in a more sustainable economy. You’re reducing waste. You’re creating something beautiful with your own two hands. It’s a fantastic creative outlet that also happens to be practical. It coects you to the history of the object and the people who made it. It’s a tangible way to make a difference, one piece of furniture at a time.
So, are you ready to dive in? Grab a brush, hit a thrift store, and start transforming. The world of furniture flipping is waiting for you. It’s challenging, rewarding, and honestly, a lot of fun. Let’s get flipping!
Frequently Asked Questions About Upcycling Furniture
Can You Really Make a Good Living Flipping Furniture?
Yes, you absolutely can! Many people start part-time, and some build it into a full-time, profitable business. It depends on your hustle, your pricing strategy, and how efficiently you can source and flip items. Some folks focus on high-end restorations, others on quick, trendy makeovers. The key is finding a niche and mastering your craft. It takes time, but the potential is definitely there for making money.
What’s the Easiest Way to Update Old Furniture?
Paint is your best friend here. A fresh coat of paint in a modern color can completely transform a piece with relatively little effort. Replacing the hardware – think new knobs or pulls – is another super easy and high-impact update. These simple changes can make old furniture look brand new. It’s all about quick furniture makeovers.
What Kind of Furniture is Best to Flip?
Look for solid wood pieces with good bones. Think dressers, desks, tables, chairs, and cabinets made from oak, maple, cherry, or pine. Avoid anything with particle board or significant damage that’s too costly to repair. Mid-century modern pieces, vintage industrial items, and antique furniture often have a strong resale market. Basically, anything with character and solid construction is a good bet for flipping potential.
How Much Should I Charge for My Upcycled Furniture?
This is a big one. You need to calculate your costs: the price you paid for the piece, plus all your materials (paint, sandpaper, hardware, etc.). Then, factor in your time. How many hours did you spend? Don’t undervalue your labor! Research what similar, professionally redone pieces are selling for in your area or online. Aim for a price that reflects the quality of your work and the value of the transformed item. A good rule of thumb is to aim for at least double your material costs, plus your labor. It’s a balancing act, but pricing your flips right is crucial.
Do I Need Special Tools to Start Flipping Furniture?
Not really, especially when you’re starting out! A good set of sandpaper (various grits), a decent paintbrush and roller, a screwdriver, wood filler, and some cleaning supplies are essential. As you get more serious, you might invest in a power sander, a paint sprayer, or upholstery tools. But you can absolutely get started with just the basics. Many DIY furniture projects can be done with minimal equipment.