
Stop Dreaming, Start Shooting: Your No-Nonsense Guide to Astrophotography
Ever just gaze up at the night sky, totally blown away? The stars, the moon, that faint band of the Milky Way. You think, “Man, I wish I could snap a pic of that.” Well, you can! Seriously, forget those fancy magazines making it sound like you need a second job to afford a telescope. Getting into astrophotography isn’t some crazy, impossible quest. It’s totally doable, even with the camera you’ve likely already got lying around.

Source : optcorp.com
My very first try? A total train wreck. Blurry blobs, grainy garbage. It looked nothing like those stunning photos you see online. Super frustrating, right? But I stuck with it. I really dove in, learned a ton, messed around with settings. Slowly, bit by bit, I started actually getting shots that looked like the sky. This is all about no-nonsense, practical advice to get you from zero to capturing stars. Let’s get you snapping.
The Absolute Bare Minimum: What You REALLY Need
Alright, let’s be straight. You do NOT need a telescope the size of a minivan. What’s the absolute first step? A camera. Ideally, one that lets you fiddle with the settings. Yeah, your phone *might* pull off something in a desperate moment, but honestly? For good pictures, you’ll want something with more oomph. Think a DSLR or a mirrorless camera, they give you so much more freedom.
Next up: a tripod. It’s a total must-have. Seriously. Trying to shoot stars without one is like trying to paint a masterpiece with a jackhammer. You need rock-solid stability. A good tripod keeps your camera perfectly still while it’s soaking up all that dim light. Don’t skimp here; a flimsy tripod is basically useless.

Source : meghanmaloneyphotography.co.nz
You also need something to trip the shutter without shaking the camera. A remote shutter release works wonders, or just use your camera’s built-in self-timer. This little trick prevents that annoying vibration when you hit the button, keeping your shots super sharp. That’s the bare minimum gear needed. Pretty straightforward, huh?
Choosing Your First Target: Don’t Aim for the Moon (Yet)
So, where do you even begin? The night sky is absolutely massive. Trying to shoot everything at once is a surefire way to get totally overwhelmed. For your first few attempts, pick something that’s not too tough. The Moon? Perfect. It’s bright, you can see details, and it’s super forgiving. You can grab awesome shots even with basic equipment.
Or how about star trails? That’s where you leave the camera shutter open for ages, capturing the way the stars seem to move across the sky. It looks totally wild and you don’t even need a pitch-black sky for it. Think of it as drawing with light. Really cool effect.
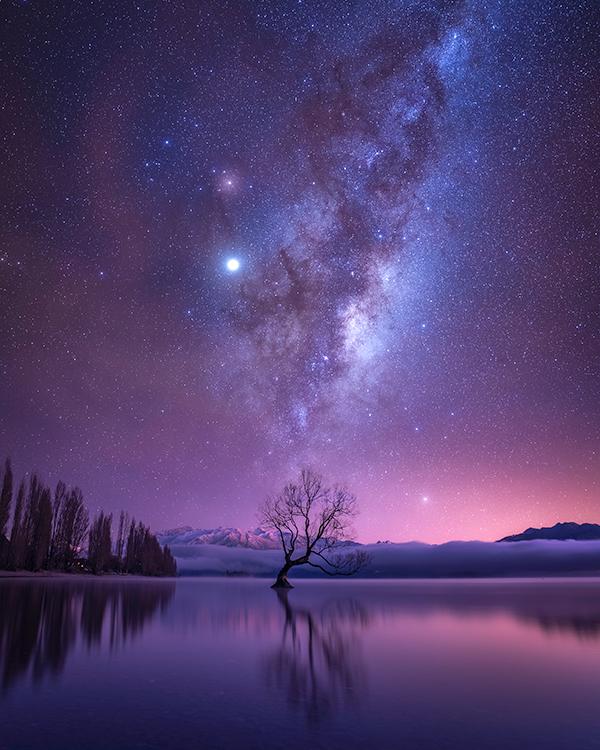
Going for wide shots of the Milky Way? Now that’s a bit trickier. You’ll need a seriously dark sky location, a decent lens, and your settings dialed in just right. But wow, when you nail it… totally worth all the fuss. Start simple, build up your confidence. Then you can aim for the big stuff.
Camera Settings: The Secret Sauce (It’s Not Really Secret)
This is where so many beginners totally stumble. They get scared of all the buttons and dials. Don’t be! Just switch over to Manual mode. You need complete control. You’re the boss now.
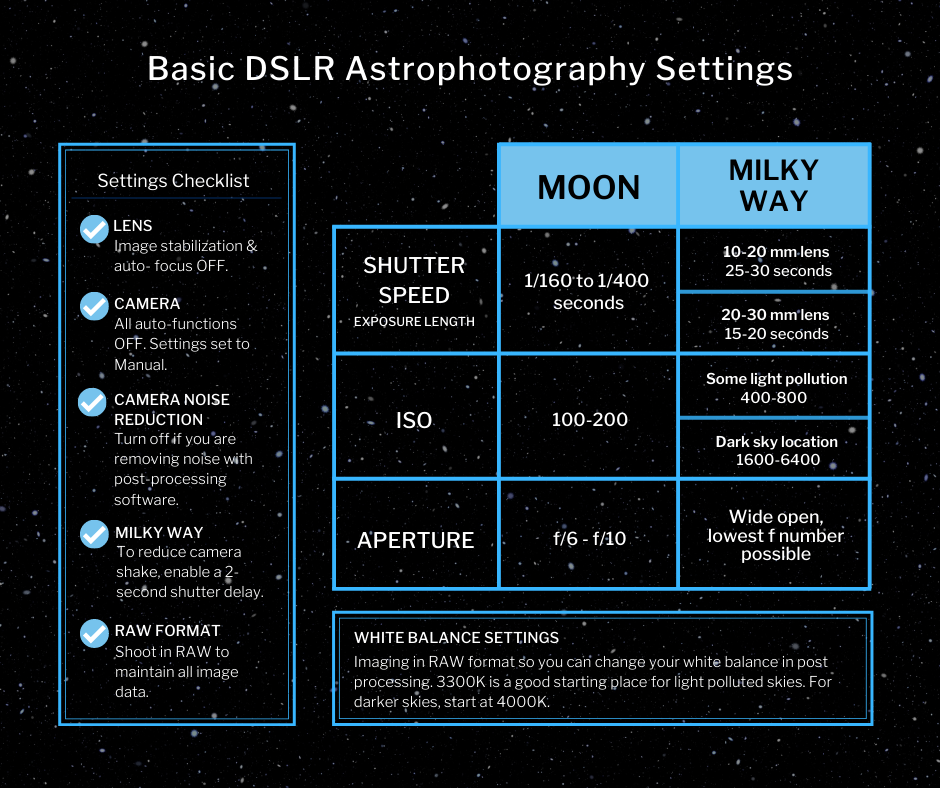
Aperture: You want all the light you can get, right? So, use your lens’s widest aperture setting. That means the smallest f-number. Like f/2.8 or maybe f/4. This lets in the most light and also gives you that nice blurred background.
Source : shutterbug.com
Shutter Speed: This controls how long your camera’s sensor is exposed to light. For stars, you can’t just leave it open forever, or they’ll look like streaks because the Earth is spinning. A good starting point for basic shots is the ‘500 Rule’. Take 500 and divide it by your lens’s focal length. So, with a 20mm lens, 500 / 20 = 25 seconds. That’s about how long you can leave it open before stars start to trail noticeably. For the Moon though, you’ll need way faster speeds, like 1/100th of a second or even quicker.
ISO: This basically makes your sensor more sensitive to light. Higher ISO means a brighter picture, but also more digital graininess. Start around 800 or 1600 and adjust from there. Modern cameras are pretty good at handling high ISOs. You’ll be playing around with ISO, shutter speed, and aperture to get the right exposure.
Focusing: This is HUGE. Your camera’s autofocus will totally bail on you in the dark. You *have* to focus manually. Find the brightest star or planet you can see, zoom in as much as possible on your camera’s screen (live view), and very carefully turn the focus ring until that little point of light is as tiny and sharp as it can get. Then, maybe even tape the ring down so it doesn’t budge!
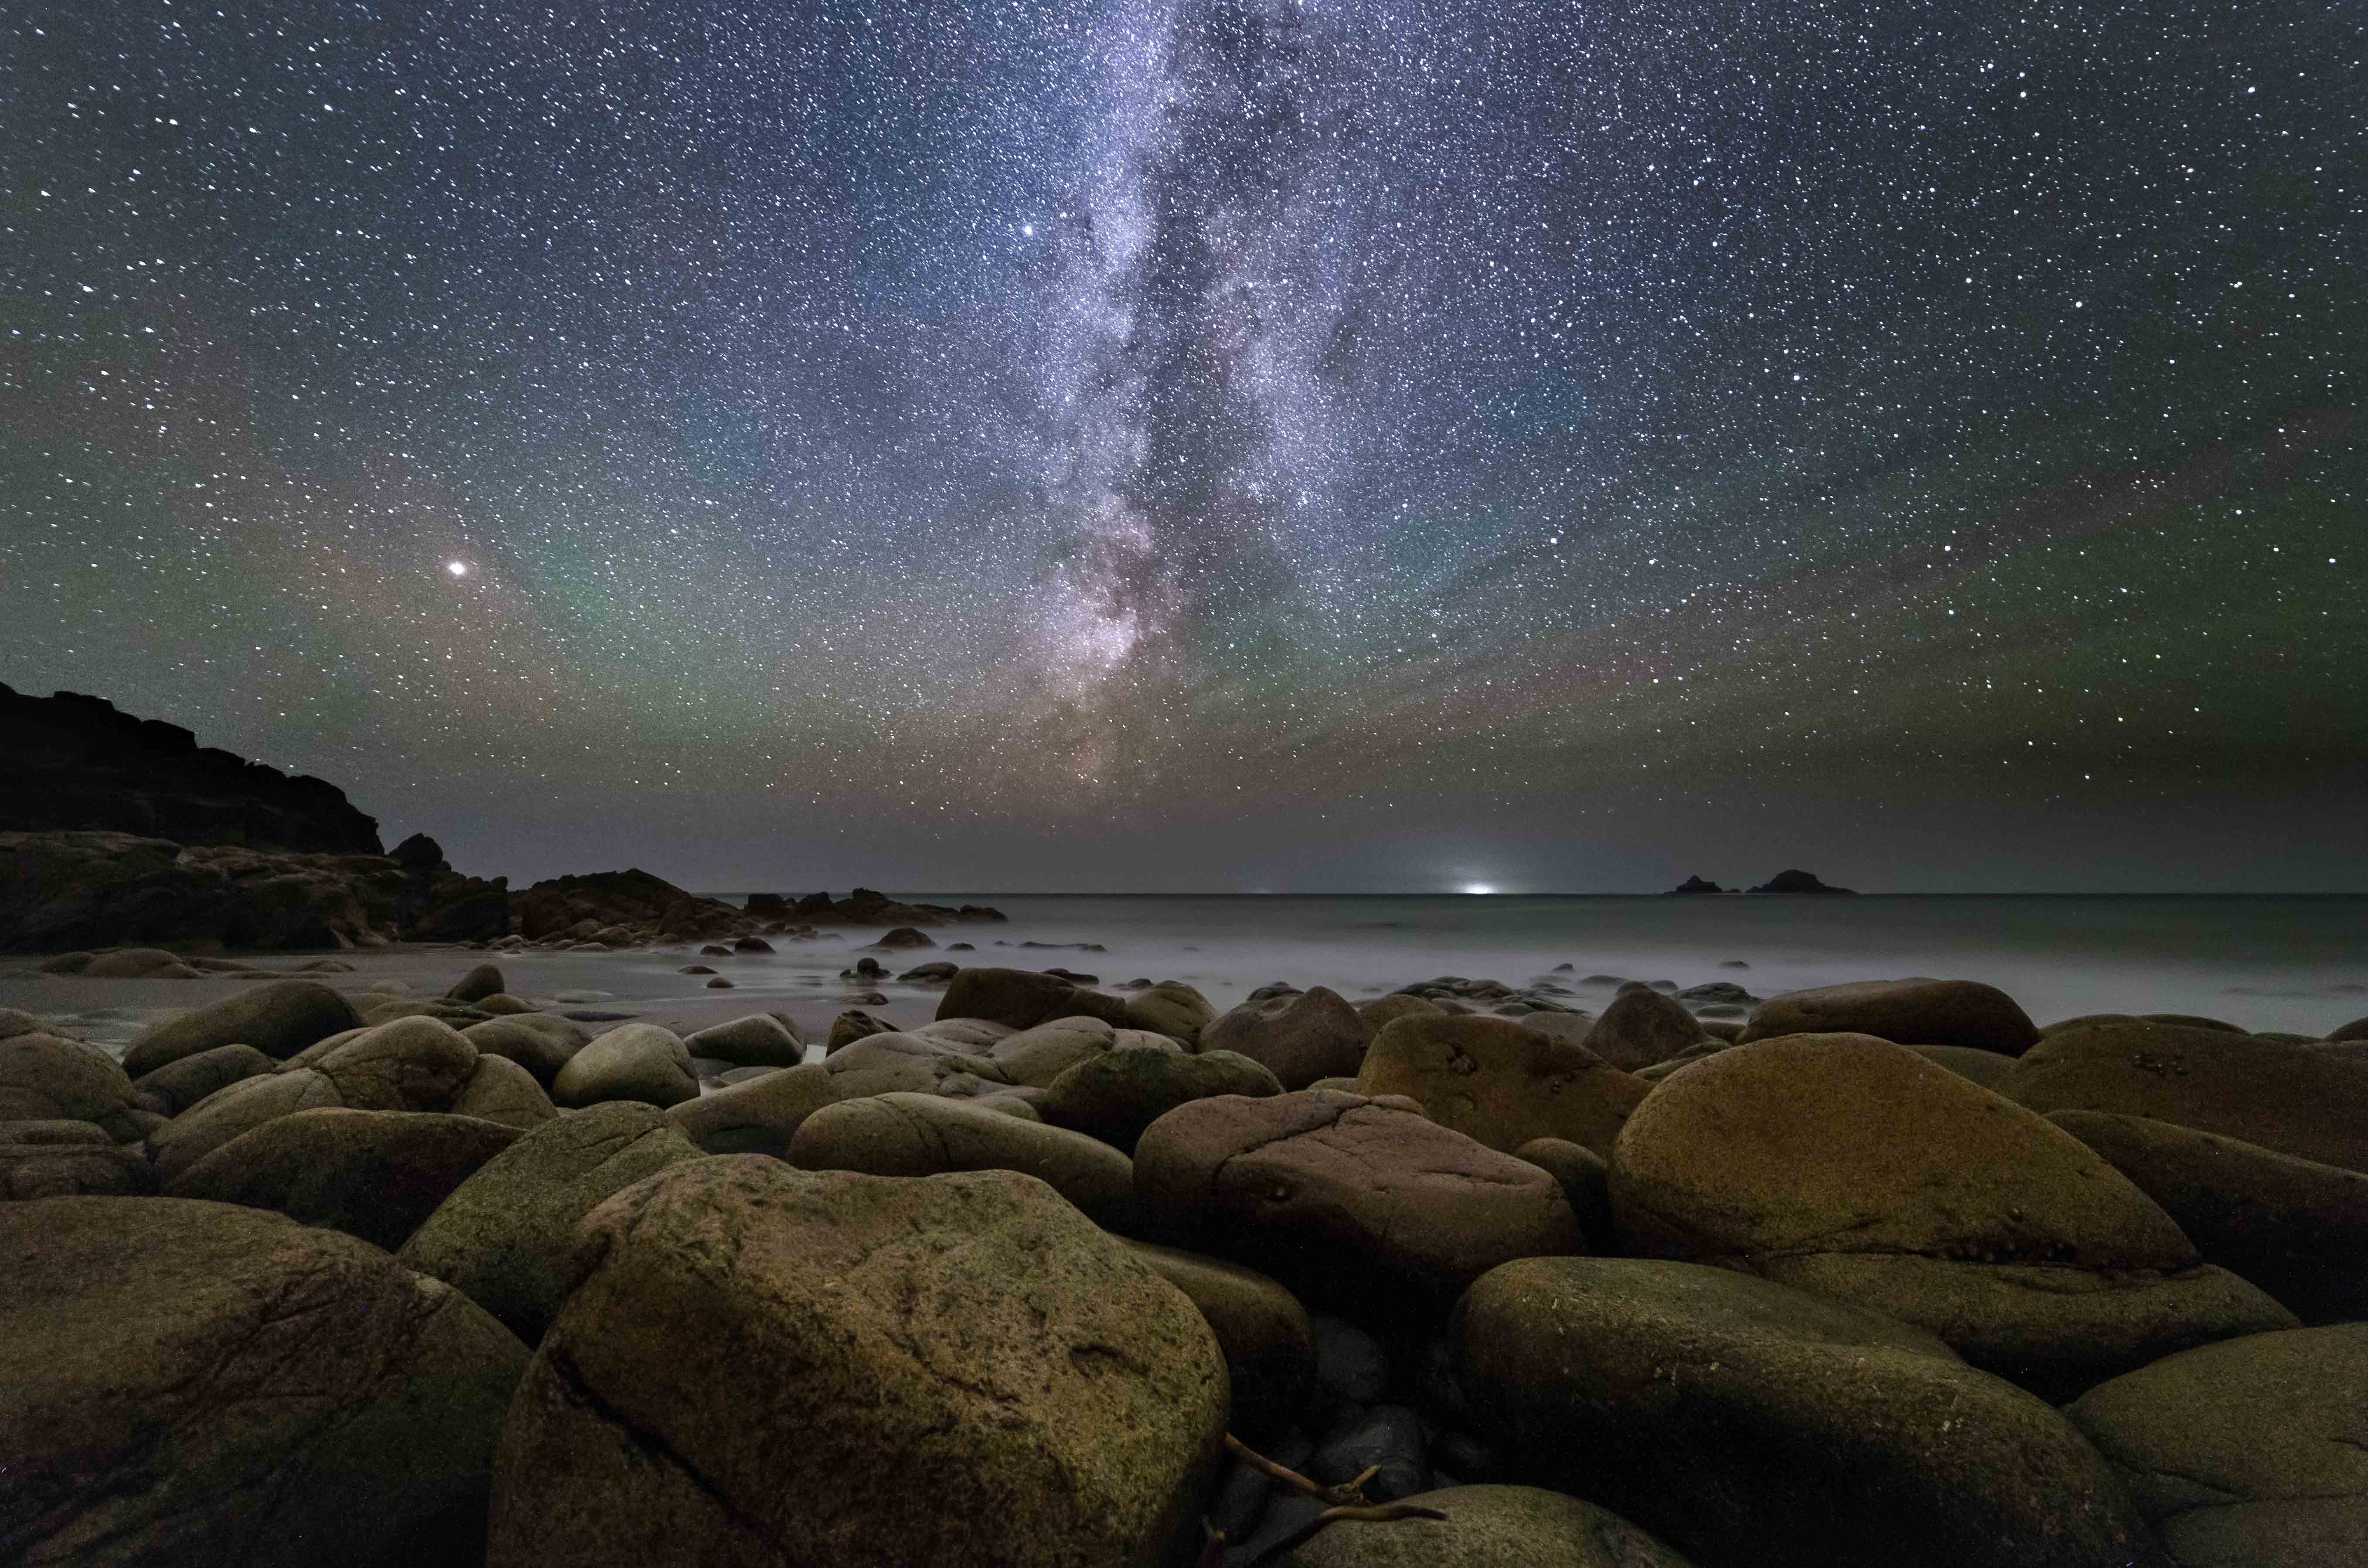
Location, Location, Location: Escaping the City Glow
You can have the best gear and settings known to humankind, but if you’re shooting right next to a bright streetlight, you’re toast. Light pollution is the absolute arch-nemesis of astrophotography. You need real, honest-to-goodness darkness.
Go look up light pollution maps online. They’ll show you where the really dark spots are. You need to get as far away from city lights as you can possibly manage. Even a spot just outside a smaller town can make a night-and-day difference. Pack some snacks, warm clothes, and maybe drag a friend along.
Source : space.com
Also, keep the moon phase in mind. A big, bright full moon will totally wash out faint objects like nebulae and galaxies. For shooting those deep-sky wonders, you want a new moon or at least a moon that’s not visible. The Milky Way tends to show up best during the summer months up north, sitting higher in the sky after it gets properly dark.
Beyond the Basics: What to Add Next
Once you’ve got the hang of the basics, you’ll probably start wanting more cool stuff. A star tracker mount is the next big jump for shooting deep-space objects. It’s this mount that cleverly follows the Earth’s rotation, letting you take super-long exposures without any star trails. This is vital for grabbing those subtle details in nebulae and galaxies.
Then maybe you’ll look into a dedicated astronomy camera. These cooled cameras are built specifically for capturing faint light and can produce mind-blowing results. But honestly, you can get some truly amazing shots with a good DSLR and a tracker for quite a while.
Don’t forget about your processing software. Programs like Adobe Lightroom, Photoshop, or even specialized astro software like PixInsight are absolutely crucial for really making your raw images pop. This is where the magic truly happens *after* you take the picture.
The Edit: Bringing Your Images to Life
Shooting in RAW format is a game-changer. JPEGs strip out a ton of useful information. RAW files are basically your digital negative. They give you the absolute most control when you get to the editing stage.
Don’t shy away from editing. Astrophotography is a two-part job: first the capture, then the processing. You’ll be adjusting exposure, contrast, those bright spots, and the dark areas. You’ll likely need to ‘stretch’ the image data to reveal those faint cosmic wonders hiding in the noise.
Source : optcorp.com
Look for tutorials online. There are tons of great resources (like beginner astrophotography guides) that’ll walk you through the editing step-by-step. It takes practice, for sure, but seeing those faint galaxies slowly appear from a dark background is incredibly satisfying.
Patience is Your Best Friend
Astrophotography is going to test your patience. You’ll deal with cloudy nights. Gear glitches. Sessions that just don’t work out. The absolute key is to just keep going. Every single person you see posting amazing astro shots started right where you are now. Probably with blurry pictures, too.
Learn from every single time you go out. What worked well? What totally bombed? Tweak your approach. Keep at it. The universe is just waiting to be photographed, and you absolutely have what it takes. So grab your camera, find a dark sky spot, and start capturing the cosmos.
Frequently Asked Questions
-
What’s the absolute cheapest way to start astrophotography?
Seriously? Your smartphone and a decent tripod. If your phone has a manual or ‘pro’ mode, use it, crank up the exposure time as much as you can, and definitely use the timer to avoid camera shake. You won’t be capturing nebulae, but you can totally get some decent shots of the Moon and maybe even some star trails. It’s a fantastic way to dip your toes in without spending any cash.
-
Do I really need a fancy telescope?
Nope! Not when you’re just starting out. Your camera lens is your telescope for now. A standard kit lens or something a bit wider can capture constellations, the Milky Way, and even big pictures of planets. You can get a basic star tracker later to attach your camera to, which is way more affordable than a giant telescope for deep-sky stuff.
-
My photos are always dark and grainy. What am I doing wrong?
That’s a classic beginner snag! You’re likely not letting enough light hit the sensor. You need to be in Manual mode, open your aperture wide (the lowest f-number possible), boost your ISO (try 1600 or 3200 and see what happens), and use a longer shutter speed. Remember that 500 Rule for star trails, or go even longer if you’re using a tracker. Editing will help a bunch too, but getting the initial capture right is crucial.
-
How important is a dark sky location?
It’s MASSIVE. Like, fundamentally important. City lights (light pollution) will absolutely obliterate all the faint details you’re trying to capture. Even with top-tier gear, shooting under a bright sky limits you to the Moon and maybe the brightest planets. Driving just an hour outside a major city can make a world of difference. Use light pollution maps online to find the darkest places near you.
-
What’s the deal with focusing in the dark? It’s impossible!
Yeah, autofocus just quits in the dark. So, you switch to manual. Point your camera at the brightest star or planet you can see. Zoom in ALL the way on your camera’s screen (that’s live view). Then, *slowly* twist your lens’s focus ring back and forth until that tiny point of light is the smallest, sharpest dot you can possibly make it. Seriously, zoom in and be patient. Some folks even tape the focus ring down so it doesn’t accidentally slip. That’s your manual focus trick.